
For effective checking an electrical system or fault, a set of tools is required. Some are simple, some more complicated, and some more expensive than others..
The tools of the trade (in order of importance):
- Test light*
- Multimeter*
- Battery charger/maintainer*
- Scantool
- Breakout box and a test cable set
- Amp clamp*
- Oscilloscope
- Signal generator
- Power probe
- Toolbox*
Test light:
A test light should be rated for the electrical installation you’re working on. If you are working on a 12V installation, as is most usual on passenger cars, then use a 12V test light. Similarly, use a 24V test light for 24V installations, as found on most trucks and buses.
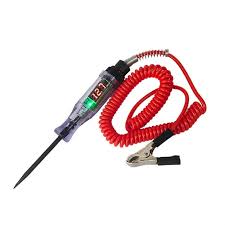
A test light should have an old-fashioned light bulb; never use test lights with LEDs. A test light with LEDs does not discriminate between low of high voltages and lights up at any voltage between 4V and 40V. Test lights with a bulb will show if the voltage is low. Additionally, bulb test lights draw a current, which helps significantly in identifying faulty connections.
The test light should have a reasonably long lead so it can even be used further away from the vehicle’s battery. The lead should have a proper clamp to secure it to a plus or minus pole of a battery or somewhere else in the car.
Make sure to use a test light with a bulb wattage in par with the power in the circuit you’ll be testing. Testing a 20W lead with a 0.1W lamp (like a LED) makes no sense and will only provide misleading testing results. Ideally, you’ll end up with a set of different test lights with different wattages.
Battery charger/maintainer:
With most activities diagnosing an electrical problem, we need to have the contact on but the engine not running. The battery of the car is not designed to cope with this very long, and if you’ve been working on the car for half an hour, the battery will drain below what the ECM (or other) module finds acceptable. This will throw a code (or several codes), thus diluting your diagnosis process. Here’s where the battery maintainer comes in.
In short, when we start working on the electrical system of a vehicle, we need to do two things:
- verify the battery is charged (if not: charge it)
- keep the battery topped up while we’re working on the car: connect a battery maintainer
In short, before we begin, measure the voltage of the car with the engine on and off. Charge if low. Then connect to a battery maintainer. Keep the maintainer hooked up during all of the work.
Multimeter:
Digital multimeters have become quite inexpensive and are handy to have lying around. As with the test light, everyone should have one.
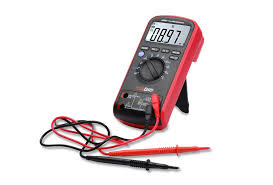
They can be used for checking battery voltage to verify that the battery is being charged. This is a basic check that is often done before checking anything else.
A good multimeter will have a backlit display. This allows it to be used everywhere, even when you’re lying under a car to measure something. Always choose one that is sturdy and, if possible, waterproof.
As with the test light, high-quality leads and clamps are quite important
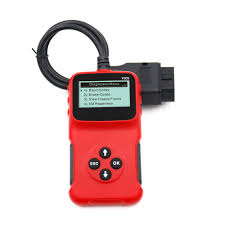
Scantool:
These vary very much in price and function. The cheapest ones come as a Bluetooth dongle that hooks into the ODB2 connector and ‘talks’ to a free app in your mobile phone or tablet computer. Such a dongle can be bought for as little as €20, while the mobile apps can be free of charge or cost a small monthly amount.
Cheap mobile setup:
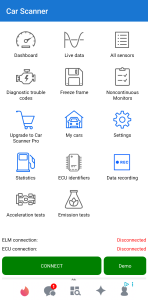
…and a Bluetooth ODB2 adapter:
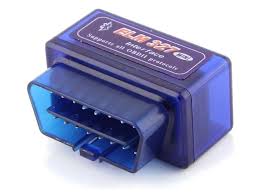
Cheap scantool:
Professional scantool:
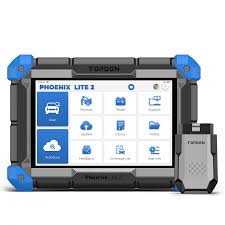
The top of the line devices are specialized tablet computers with brand-specific software that gives access to all of the data available in the car. The also allow the programming of new modules and create new keys. The prices vary from €40 for a simple fault code reader to hundreds of Euros for a specialized device.
The more expensive devices often require subscriptions but may provide access to brand service data or electrical diagrams. I’ve seen one claiming to have built-in AI assistance that helps you with the diagnosis process.
Breakout box and a test cable set:
During the diagnostic process, some measurements can be done right at the ODB2 contact. With this connection usually placed under the dash and not easily available for access other than connecting a scan tool, you can instead use a breakout box:
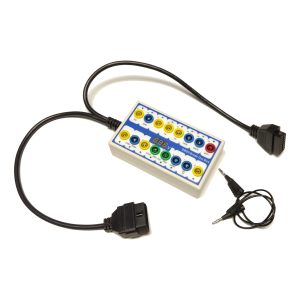 This box connects to the car’s ODB2 contact and in many cases provides for an additional ODB2 contact. This allows for a scantool to be connected while using the breakout box.
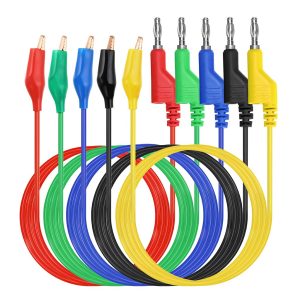
The colored connectors on the box take regular banana clamps as used in multimeters and test cable sets:
Fun fact:
A breakout box that uses LEDs to show what pins are live (the pins for battery plus and the CAN channels) does draw a small current. This current, however small, may influence your battery drain measurements!
Amp clamp:
This tool is used to measure larger currents. While most multimeters can measure lower currents, some up to 10A, they do not work for higher currents. In the best case, exceeding the current limit of the multimeter throws a fuse. But an amp overload can also burn up a circuit, which will most likely brick your multimeter.
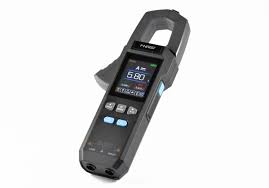
…or with a built-in multimeter:
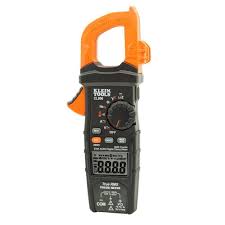
Amp clamps are equipped with a clamp that surrounds the cable you want to measure the amps in. The clamp must be closed fully in order to get a correct measurement.
Many amp clamps are combined with a multimeter, which can be handy as you only have to buy one tool.
Oscilloscope:
This is a slightly more complicated tool than the ones mentioned above. An oscilloscope, or ‘scope’ in short, has a screen that can be used to visualize the measured values over time. It can be used to check that a sensor provides a correct signal. Or the scope can be used to check that the signals sent over the car’s network seem correct.

In their most basic form, scopes have one channel for measurements. But more advanced devices often have two or more channels. Many high-end scantools are equipped with a built-in scope.
It is most usual to use the scope to visualize voltage signals, such as from sensors and within networks. But the scope will not tell what is correct and what is not. In both cases, sensors or networks, the signal measured with the scope must be compared with known good signals. This as in some cases a sensor signal may look correct but has been phase switched. This would provide a very similar signal but mirrored in the X-axis.
Playing with the grid units for the Y-axis and X-axis will vertically amplify (Y) or horizontally stretch out (X) the signal. This can provide a better view of even weak high-frequency signals. The more advanced models can even record the measurements for later reference or comparison with known good signals.
Signal generator:
In some cases, testing an activator is not possible using the signalling as produced by the modules in the car. In such cases, a signal generator may be used to mimic the required signal and allow testing of the actuator.
Many scopes have a built-in signal generator. The signal generator is a less frequently used device than the devices above. So buying a combined device may save you money.
Commonly used wave forms are:

Power probe:
Some components are easiest tested by providing them with power and/or ground. For this purpose, the Power probe provides just that in a safe manner:
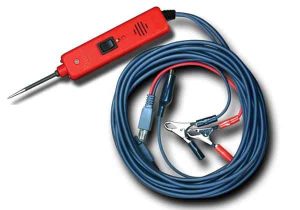
Note that PowerProbe is a brand, but other brands provide similar functionality and are called power probes anyway.
A good probe will provide you with a long lead with a fused battery plus and a solid ground. The idea is to connect the leads directly to the battery and then be able to use the probe in, under, and around the car while having access to proper power and ground.
A typical example where a probe shines is testing the electrical fuel pump under the car. Most likely, there’s no power around, and even a solid ground might be an issue under an older vehicle.
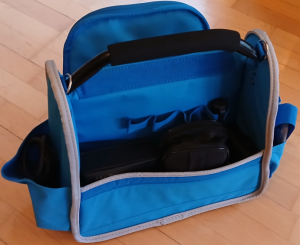
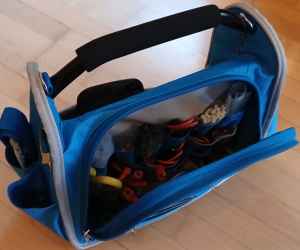
Toolbox:
As trivial as it may seem, having a proper toolbox to store your equipment in is crucial. I have two toolboxes: one with mechanical tools, and another with my electric tools. When I’m out on a job or just working on my own cars, I grab the toolbox for the job and know I’ve got all my stuff with me.
In the list of electrical tools at the top of this page, some items are marked with a *. These are the ones I have in my electrical toolbox. The unmarked items are on my list for future buys.
When I’m buying a toolbox, I need it to have the following:
- a solid handle
- the toolbox should not collapse on itself
- a lot of small and medium-sized compartments
- it must be made of sturdy materials
Depending on your situation, you can come up with extra requirements:
- watertight
- lockable
- on wheels
- shoulder strap
- …
Here are my toolboxes:
Mechanical:
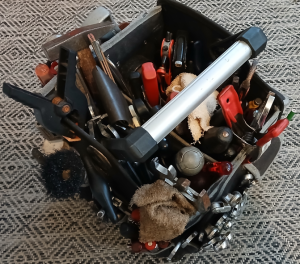
Electrical:
…
Paul
2025-09
Sweden
This page is part of a series. You can find the main page for the series here.