
A good friend of mine has an Audi A2. This now-quite-unusual car was built between 1999 and 2005. Contrary to almost anything else on the market at that time, the body is completely made from aluminium. Allegedly, the cars were too expensive to build, so production ceased after only a few years. A shame really, because I find the car looking quite appealing, and the aluminium body takes away the usuual rust issues we encounter with cars built from steel.
Anyway, the AC in his A2 had stopped working, which isn’t great in the summer. A friend of the owner, an A2 specialist, had already diagnosed the car for him, and even provided the part to be replaced: the ‘sensor for evaporator outlet temperature‘. This sensor seems to be a part that regularly fails on older A2 cars. The owner asked if I felt it was doable to replace the sensor. While I generally avoid working on modern cars, I was kind of curious about the procedure. And I had never laid my hands on an A2 before, so it would be nice for my technical CV!
When inquiring if I’d be willing to do the job, my friend was kind enough to send me a link to a YouTube video doing this exact job. I studied the video and decided to accept the challenge.
The fault code
The diagnosis done by the specialist revealed trouble code 00818 to be present. The official Audi description of this code is:
00818 – Sensor for Evaporator Outlet Temperature (G263): Open or Short to Plus
But what does that mean, Open or Short to Plus?
‘Open‘ implies an open circuit: a wire, a connector, or the sensor itself has a broken electrical connection
‘Short to Plus‘ points to a short circuit. Again, somewhere in the wiring loom or in the sensor itself
This is what Audi and Volkswagen tell us:
Possible Causes
- Wiring/Connector(s) from/to Sensor for Evaporator Outlet Temperature (G263) faulty
- Sensor for Evaporator Outlet Temperature (G263) faulty
Possible Solutions
- Check Wiring/Connector(s) from/to Sensor for Evaporator Outlet Temperature (G263)
- Check Sensor for Evaporator Outlet Temperature (G263)
- Check Measuring Value Blocks (MVB)
With the diagnosis already done by the specialist, and the sensor being a weak point according to the internet, and the sensor already available, we were simply going to replace it.
How to
The procedure as described in the YouTube video is split into the following chapters:
- Remove door-sill trim
- Remove under-dash trim
- Remove metal plate
- Remove sensor connector
- Replace sensor
- Then rebuild everything again in the reversed order
That sounds easy enough! Following the exact instructions as per the video, the job came very close to the video.
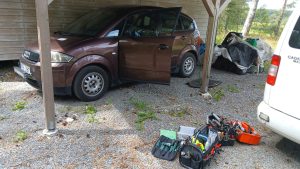
The car with all my toolboxes:
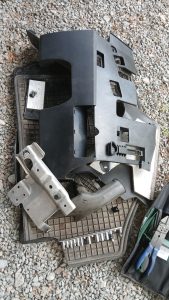
Various trimming and bracketry that was removed:
The sensors:
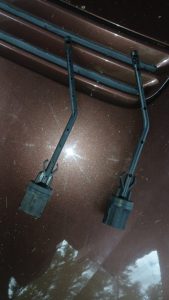
…the old and the new.
A view of the sensor:
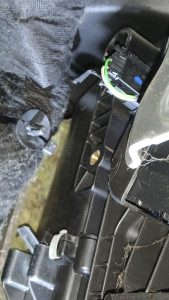
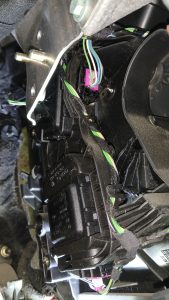
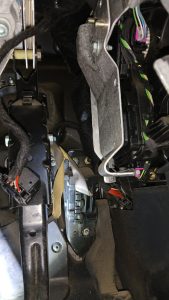
…if you can find it!
The sensor is located about 25 cm over the accelerator pedal. That implies removal of trim and brackets hindering access to the sensor. The sensor itself has one two-pin connector attached, and two plastic clips holding it in place. Pull to get it out, and push until the click to put it in.
Notably, the location where the sensor is mounted is not visible. Instead, you have to pay attention to where the old sensor came from, and feel your way to install the new sensor. Luckily, it clicked in place; having to put back a screw in there would have been a serious challenge!
Deviations
When removing the tray-trimpiece installed on the underside of the dash, two unexpected electrical cables were found, a yellow and a black one. They were led loosely over this tray from the A-pillar to the center console. It was very clear that they were not original, but a later addition. The car itself is fairly standard, but the radio is not standard. Perhaps the cables were for the radio? No clue, but the cables were in the way for the trim to be removed, so I cut both cables after having checked that I had brought everything to reattach them later.
When it was time to reinstall that trim piece, I found that the black cable was a very thin shielded coaxial type of cable. The type that is used for antennas. That was not what I expected when I cut it, or I would not have done so. But luckily, my electric toolbox is well-equipped, including soldering equipment. I reconnected the inner and outer parts of the two cut ends, soldered them, and covered the repair with a heat-shrink tube.
As I hadn’t done the diagnosis, I asked the owner if he knew if the trouble code should be removed from the electronic module. But no, it is supposed to be wiped by the car when the problem is solved. Notably, this error code doesn’t lead to the money light lighting up.
We started the car and verified cold air was now provided – which it was. Happy days!
Case closed!
For more interesting cases, look here.
If you like the above, please consider subscribing to content like this from this site. We only need your email address, and it will only be used to inform you when new content is published. We do not distribute your email address to third parties.